
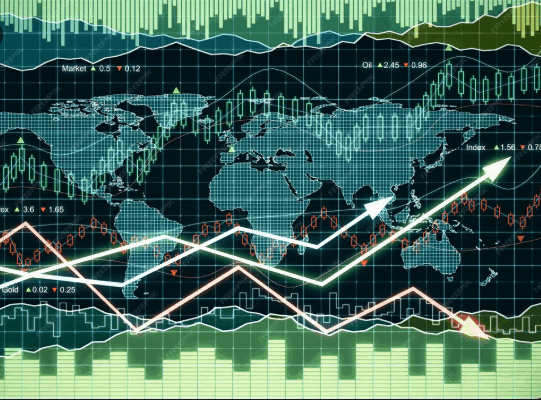
I still remember the night I stayed up until 2 AM downloading every free supply and demand zone PDF I could find.
It started because I blew a trade on GBP/USD that made absolutely no sense to me. I had a clean setup, a good risk-to-reward ratio, everything looked right. Then price just reversed out of nowhere — or so I thought — and stopped me out. I watched it retrace back to a level I had ignored on my chart, bounce perfectly, and shoot 200 pips in the direction I originally wanted.
I was frustrated. More than frustrated, I was confused. How did I miss that level?
A trader in a group I followed kept talking about supply and demand zones like they were some kind of cheat code. So I did what every beginner does: I went on a PDF downloading spree. TradingView forums, Telegram channels, random Forex websites — I collected 11 different PDFs over two weeks.
Most of them were garbage. A few had genuinely useful stuff buried inside walls of confusing theory. And one — ironically the shortest one — actually changed how I read charts.
This article is everything I wish someone had told me before I wasted those two weeks. I’ll break down what supply and demand zones really are, how to actually draw them correctly, how to use the PDFs that are worth your time, and the mistakes I made so you don’t have to repeat them.
First, Why Supply and Demand Beats Regular Support/Resistance (at Least for Me)
I’m not going to trash support and resistance. I still use it. But there’s a core difference that clicked for me eventually.
Support and resistance levels are usually drawn at a price where the market has already reacted. You’re marking a line at the wick tip or the close of a candle because price bounced there before.
Supply and demand zones are different. You’re identifying the origin of a move — the actual area where a big player placed orders that caused the price to explode away. The theory is: those orders weren’t all filled the first time. So when price comes back to that zone, the remaining orders get triggered again.
Whether that’s 100% literally true or not, the practical result is that these zones give you wider, more forgiving entry areas rather than a single price line. For me, that made a huge difference in how I managed entries.
What a Real Supply or Demand Zone Looks Like
Before getting into the PDFs and tools, let me just describe this visually because I spent way too long confused by bad diagrams.
A demand zone is a rectangle drawn at the origin of a strong bullish move. You’re looking for a place where price was moving sideways or slightly down, then suddenly launched upward with strong momentum. That sideways consolidation area before the launch — that’s the zone. Not the candle that launched. The base before it.
A supply zone is the same thing flipped. Price consolidates or drifts upward, then drops hard. That consolidation area before the drop is your supply zone.
The key things that make a zone “strong” (and this took me a while to see):
- The move away was fast and strong. A slow grind out of a zone means weak orders. A sharp, aggressive move means someone big stepped in.
- The zone hasn’t been tested many times. Every time price revisits a zone, some of those orders get consumed. A fresh zone that price hasn’t touched since forming is the most powerful.
- The zone is relatively tight. Huge zones (500+ pips wide on a daily chart) are less useful for precise entries. You want something you can actually trade around.
The PDFs — What I Found and What Was Worth Keeping
Let me be straight with you: most free PDFs on this topic are recycled content. They define the concept, show you a perfect example on a historical chart, and then leave you to figure out everything else yourself.
Here’s how I’d categorize what I found:
The “Theory Dumps” — About 6 of the 11 PDFs I downloaded fell into this category. Pages of definitions, some decent diagrams, but zero practical guidance on how to handle zones that overlap, what to do when a zone gets broken, or how to size your position around them. Helpful for getting the concept, useless for actual trading.
The “Too Complex” ones — Two PDFs went deep into institutional order flow, smart money concepts, and multi-timeframe confluence. Good stuff eventually, but brutal for a beginner. I came back to these six months later and got more out of them.
The Genuinely Useful Ones — Two PDFs actually gave me actionable frameworks. One had a simple checklist: is this zone fresh? Was the move away impulsive? Is there a higher timeframe confluence? The other showed bad zone examples alongside good ones — and that comparison format was incredibly valuable. Seeing why a zone was weak taught me more than seeing perfect examples.
If you’re looking for PDFs, search specifically for “supply demand zones checklist PDF” or “supply demand zones examples PDF” rather than just “supply demand zones PDF.” The checklist format ones tend to be far more practical.

How I Actually Draw Zones Now (Step by Step)
After going through all those PDFs and then months of actually marking up charts, here’s my personal process. I use TradingView — free version works completely fine for this.
Step 1: Start on the Higher Timeframe
I start on the daily chart. I want to see the big picture first — where are the major demand zones below current price? Where are the major supply zones above?
I don’t draw every zone. I look for the ones that caused the biggest, most explosive moves. Those are the zones that matter.
Step 2: Draw the Rectangle
On TradingView, I use the Rectangle tool (shortcut: R). I draw it to cover the consolidation base before the big move — not the move itself.
For a demand zone:
- The bottom of the rectangle goes at the lowest wick of the consolidation
- The top goes at the highest close within that base (some traders use the highest open instead — I’ve tried both, the difference is minimal)
For a supply zone:
- The top of the rectangle is the highest wick
- The bottom is at the lowest close within the consolidation
Step 3: Check the Strength
Before I mark it as a tradeable zone, I ask myself:
- Did price leave this zone fast? (2-3 strong candles in one direction = yes)
- Has this zone been retested before? (Fresh = stronger)
- Is there a round number nearby? ($1.2000, $1.3000, etc.) — round numbers amplify zones
Step 4: Drop Down to the Lower Timeframe for Entry
Once I have a good daily zone, I drop to the 1-hour chart to look for entry signals within the zone. I’m not just buying the second price enters the zone — I wait for a reaction: a rejection candle, a small double bottom, a clear shift in momentum.
This was the step I skipped for months. I was just setting limit orders at the top of demand zones and hoping for the best. Adding that entry confirmation on the lower timeframe cut my losing trades in that zone significantly.
The Mistakes I Made (And Still Catch Myself Making)
Mistake 1: Drawing Zones at Every Consolidation
For a while, my charts looked like a rainbow of rectangles. I had zones everywhere. The problem is that too many zones create noise — you end up justifying any trade because “there’s a zone nearby.”
I forced myself to limit it: no more than 3-4 key zones per asset on the daily chart. The ones that caused the absolute biggest moves only.
Mistake 2: Holding Onto Broken Zones
A zone that price has sliced through cleanly is a dead zone. Doesn’t matter how beautiful it was. I kept “hoping” that a broken zone would hold as a new level. Sometimes it did, but not reliably enough to be worth the losses when it didn’t.
My rule now: if price closes convincingly beyond a zone (not a wick — a full candle close), I delete the zone. No arguments, no “let me see what happens.”
Mistake 3: Trading Every Retest Automatically
This is the biggest one. The PDFs make it look like: price returns to zone → you enter → price goes up. Reality is messier.
Price can enter a demand zone and just keep falling straight through it. This happens in trending markets, during news events, or when a higher timeframe supply zone is directly overhead.
I learned to check: what is the overall market structure? Is the market in a downtrend on the daily chart? If so, demand zones are far less reliable — the bigger pressure is to the downside. I only trade demand zones aggressively in uptrending or ranging markets.
Mistake 4: Ignoring the Gap Between Zone and Entry
Because zones are areas (not single lines), you sometimes enter at the top of a demand zone and price dips further into the zone before reacting. This used to panic me into closing early at a loss, only to watch price bounce from the bottom of the zone.
Now I size my position knowing that I might add a second entry if price goes deeper into the zone. The total risk is still within my 1-2% rule, just split across two entries.
What About the PDF Resources That Cover “Institutional” Supply and Demand?
Once you’re comfortable with the basics, there are PDFs and courses that go into what’s called smart money or institutional order flow. These overlap heavily with supply and demand but add concepts like:
- Order blocks — similar to supply and demand zones, but specifically tied to the last bearish candle before a bullish move (or vice versa)
- Fair value gaps — imbalances in price where institutions may have left unfilled orders
- Liquidity sweeps — where price briefly breaks a major level to trigger stop-losses before reversing
I’ve found these concepts genuinely useful after I had supply and demand basics locked in. But I’d strongly recommend not jumping into that level before you can consistently identify and draw clean supply and demand zones on your own. The advanced stuff builds on the basics — it doesn’t replace them.

Which Tools I Actually Use Day-to-Day
Since I get this question a lot:
TradingView — Free version is enough. I use it on both my laptop and my phone (the app is actually really good). I keep my zones saved in my chart layouts so I don’t have to redraw them every session.
A plain notebook — Yes, really. I sketch out the charts by hand sometimes when I’m analyzing before bed. Something about drawing it manually forces me to actually think about where the zones are rather than just clicking rectangles.
Forex Factory — Not for zones, but for the calendar. I check this every morning to know which currency pairs have major news that day. I don’t trade into news events when I’m inside a zone — too many false moves.
MetaTrader 4 — My broker uses MT4 for actual execution. The charting isn’t as clean as TradingView but it does the job for placing orders.
How to Get the Most Out of Any Supply and Demand PDF
If you’re going to go download a PDF (and you probably will, there’s nothing wrong with that), here’s how to get actual value from it instead of just reading it and forgetting everything:
1. Open a chart while you read. Don’t read the PDF passively. Every time they show an example, find a similar setup on your own chart. Ideally a historical one you can verify played out the way they describe.
2. Look for the PDF’s “rules.” Good PDFs have a checklist or a set of conditions. Write those down in your own words. If the PDF doesn’t have clear rules, it’s probably not worth your time.
3. Backtest one pair for 30 days. Pick EUR/USD daily chart. Go back 12 months on TradingView. Mark every supply and demand zone using the rules from the PDF. Count how many times price reacted meaningfully vs. how many times it didn’t. This is the only way to know if the method actually works — not just looking at the cherry-picked examples in the PDF.
4. Mark on your chart, not just mentally. If you’re reading about a zone type and thinking “yeah I see that,” but you haven’t actually drawn it on a live chart, you don’t really know it yet. Your hands have to do the work.
A Quick Word on Combining Zones With Other Confluences
I don’t trade supply and demand zones in isolation. That’s not me being fancy — it’s just that using confluence makes a meaningful difference in win rate.
The confluences I look for most often:
- Round numbers / psychological levels — A demand zone sitting right at 1.2000 on EUR/USD is far more powerful than one sitting at 1.2037.
- Fibonacci retracement levels — If a zone aligns with a 61.8% or 50% retracement of the last major move, I pay extra attention.
- Session timing — A zone that gets hit during London or New York open has more weight behind it than one tested during the quiet Asian session.
- Trend alignment — Demand zones in an overall uptrend. Supply zones in an overall downtrend. Simple but effective.
None of these individually are magic. Together, they help me filter out the weaker setups and focus on the ones where multiple things are pointing in the same direction.
Is There a “Best” Supply and Demand PDF? Here’s What I’d Tell You
After going through 11 of them and then spending months actually trading with the concept, I’d say the answer isn’t really about finding the perfect PDF.
The concept itself is not complicated. A strong move had to start somewhere. That somewhere likely still has unfilled orders. When price returns there, those orders may trigger again.
The execution is where people struggle — and that comes from screen time, not from reading more PDFs. The PDFs that helped me most were the ones that gave me a framework and then told me to go practice, not the ones that tried to explain every single scenario upfront.
If I were starting fresh today, I’d find one PDF with a simple checklist (fresh zone, impulsive move away, clean chart structure), mark zones on six months of EUR/USD history, and log every result in a spreadsheet. That exercise alone would teach you more than most courses or PDFs.
Things I Wish I Knew Earlier
- Price doesn’t always reverse exactly at the zone edge. Give it some room. That’s why it’s called a zone, not a line.
- Not all zones work. Your job isn’t to find perfect zones — it’s to find the ones with the best probability and manage your risk when they fail.
- Redrawing zones constantly is a sign you don’t understand the original move. If your zone changes every day, go back to basics.
- Screen time matters more than PDFs. 100 hours of chart reading beats 10 PDFs every time.
- Keep it simple longer than you think you need to. The traders who go deep into complex zone theory too early usually come back to the basics after blowing accounts.
Final Thought
I still use supply and demand zones. They’re a core part of how I read charts, and they’ve held up over time in a way that a lot of other concepts I’ve tested haven’t.
But they didn’t come from a PDF. The PDF just gave me a starting point. The real understanding came from marking up hundreds of charts, taking trades, keeping a journal of what worked and what didn’t, and slowly getting better at reading what price was telling me.
If you’re at the beginning of that process right now — downloading PDFs at 2 AM, trying to find the secret method — I get it. I was exactly there. Just don’t let the research become a substitute for actually sitting with charts.
Download one good PDF. Learn the basic rules. Open TradingView. Draw some zones. See what happens.
That’s how it starts.
Frequently Asked Questions:
1: Advanced supply and demand trading PDF free download
You can find advanced supply and demand trading PDFs for free on TradingView community scripts, Babypips forum, and Telegram trading groups — just verify the source before trusting the content.
2: Trading supply and demand zone PDF free download
The best free supply and demand zone PDFs are available on forex education sites like Babypips, ForexFactory threads, and YouTube channel resource links — search with “PDF” in the description box.
3: Trading supply and demand zone PDF download
To download a supply and demand zone PDF, visit trusted forex education platforms, look for the resource or “free download” section, and always check if the PDF includes real chart examples, not just theory.
4: Mastering price action trading with supply and demand PDF
Mastering price action with supply and demand comes from combining zone identification with candlestick confirmation — most free PDFs on this topic are available through Sam Seiden’s published work and ICT educational resources.
All content on this site is for educational purposes only. Trading Forex involves significant risk of loss and is not suitable for all investors. Always do your own research before making any trading decisions.
Hira Ch is a Forex trader and financial content writer specializing in gold, crypto, and currency markets.Based in Lahore, she breaks down complex trading
concepts into simple, actionable insights at ExpertJourny.